Library card pocket for a junk journal
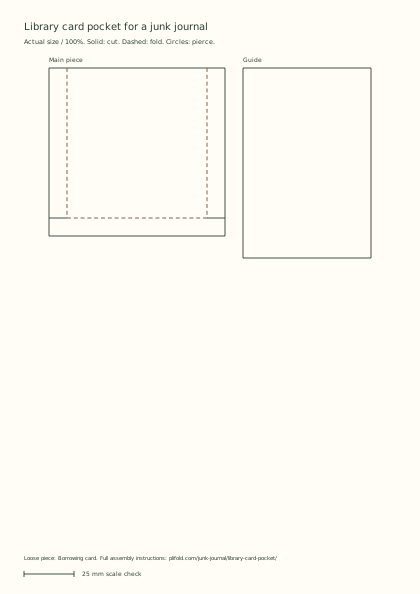
Build a freestanding pocket with three folded glue tabs. A matching borrowing card leaves room for a book title, a reader and the return date.
- Method
- Pockets and inserts
- Main cut size
- 88 × 84 mm
- Print size
- A4 or US Letter at 100%
Materials and tools
- 140–160 gsm pocket stock, an existing journal page, paper glue, scissors and a pencil.
Step by step
- Free the tabs Cut the rectangle and its two short side cuts. Snip away the two 9 × 9 mm corner squares below those cuts. The bottom flap now sits between two side flaps.
- Set the open pocket Fold the sides and bottom behind the 70 × 75 mm face. Apply glue to the folded flaps and press the pocket onto a page, keeping its top open.
- File the borrowing card Cut the printed card. Rule a line for a title and shorter lines for readers and dates. Wait for the pocket to dry before inserting it with the heading above the pocket lip.
Check the finished piece
The loose card should protrude by about 20 mm. Move the pocket away from the binding if the top corner collides with a turning page.
This pattern has a digital scale drawing. An independent paper build is pending.
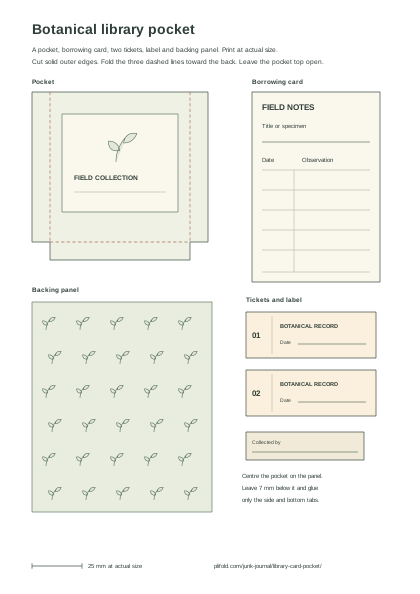
Botanical library pocket printable kit
One sheet makes a pocket, a ruled borrowing card, two tickets, a spine label and a leafy backing panel. Print on 140–160 gsm paper. Cut the solid outlines, fold the three dashed tabs behind the pocket and glue the tabs to the backing. Leave the top edge open for the card.
Use the plain template above to trace a pocket onto your own patterned paper.