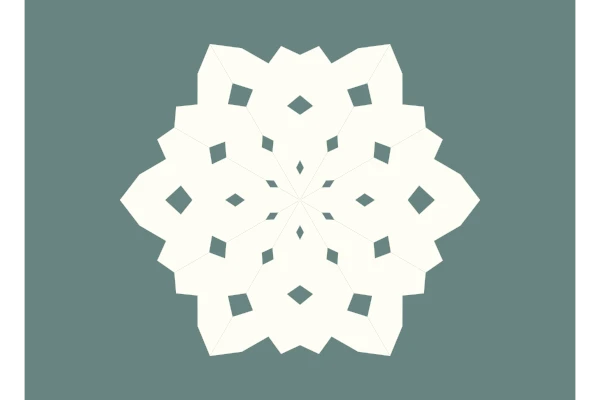
Paper for a six-point snowflake
- One sheet of light copier paper or craft paper, 70–90 gsm. A second sheet lets you practise the folds before making a cut.
- Small sharp scissors, a ruler and a smooth table. Use the point of a pencil to mark the shaded side on a practice sheet.
Step by step
- Print and check the circle. Choose the PDF for the paper in your printer and print at actual size. The short bar at the foot of the sheet should measure 25 mm. Cut around the outer circle. Leave every interior line intact for now.
- Make a half circle. Place the circle printed side up with the horizontal diameter across the table and the shaded wedge above it on the right. Fold the lower half behind the upper half. The long straight edge now runs along the bottom. Keep the small marked wedge facing you.
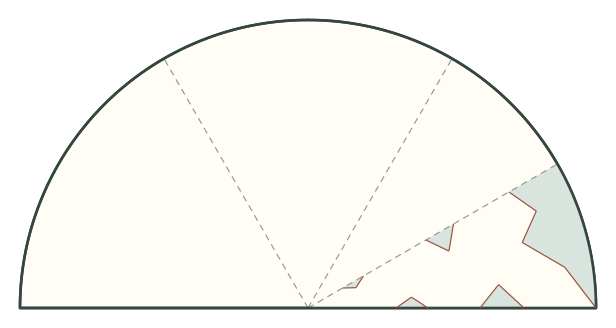
Semicircle, 2 layers. The straight fold is below and the marked sector is on your right. - Stack the three sectors. Look at the semicircle as three equal slices. Fold the left slice behind the middle one, using the left third line. Then fold those layers together behind the right slice along the right third line. Your remaining fan spans 60 degrees. Its pointed end is the centre of the original circle.
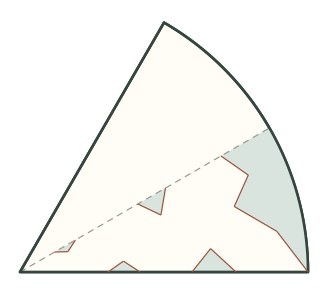
60° fan, 6 layers. The two folded thirds sit behind the right-hand third. - Keep the marked wedge on top. Fold the upper half of that fan behind the lower half at the last dashed line. You should see the shaded pattern on a 30-degree wedge. Pinch the point gently. Check that the curved rims line up at the wide end before making the creases firm.
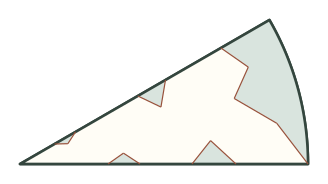
30° wedge, 12 layers. The shaded scraps are visible on the top face. Both folded edges meet at the centre on the left. - Cut out the shaded pieces. Start each notch at an open edge. Cut inward to the corner, stop there, then approach the same corner from the other side to release the scrap. Trim the outer profile through all layers. Leave the pale centre and both stretches of folded paper between adjacent notches connected.
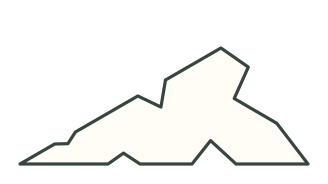
After cutting, the narrow wedge is still one piece. Compare the notches on both edges before opening it. - Open in reverse order. Release the narrow fold first. Open the two thirds to recover the semicircle, then open the diameter. Ease a snagged tip apart with your fingers. Lay the six points flat and compare the spacing of opposite tips with the preview.
Why the points come out in pairs
The two sides of the small wedge are folds. A notch cut into one side reflects into its neighbour. The same notch cut into the other side sits in a different place on the next spoke. A complete turn repeats every pair six times. Keep a finger on the pointed end while you work so that each notch meets the same position on the bottom layer and the top one.
If a point or a notch is missing
Before unfolding all the way, fan the outer edges just enough to see the bottom layer. An uncut bridge at the corner of a shaded piece means the blades stopped short. Close the packet along its existing creases and finish that corner. If the whole wedge slips sideways as you cut, open it to the last fold, bring the curved rims back together and hold nearer to the blades.
Hang the finished cutout
Choose one broad arm for a hanging loop. Slip a fine thread through an open notch near that arm and tie the ends above the point. To mount it on a card, glue the middle first. Smooth one pair of opposite points at a time with a clean scrap underneath. The preview is calculated by reflecting the cut wedge across its folds. An independent paper build is pending.